Okay, so I recently spent some time fiddling with a magnetic drive pump, one of those smaller ones you see for moving liquids around where leaks are a big no-no. Thought I’d share what I did and what parts I saw.
Getting Started – Taking it Apart
First thing, I had to get the pump disconnected, obviously. Made sure no power was going to it. Then, I started taking the main body apart. Usually, there are some bolts or screws holding the pump casing, the ‘wet end’ part, to the motor section. I just unscrewed those carefully.
Once those were off, I could pull the front casing away. This is the part where the liquid actually goes in and out. Inside that, you start seeing the main working bits.
The Core Parts – Impeller and Magnets
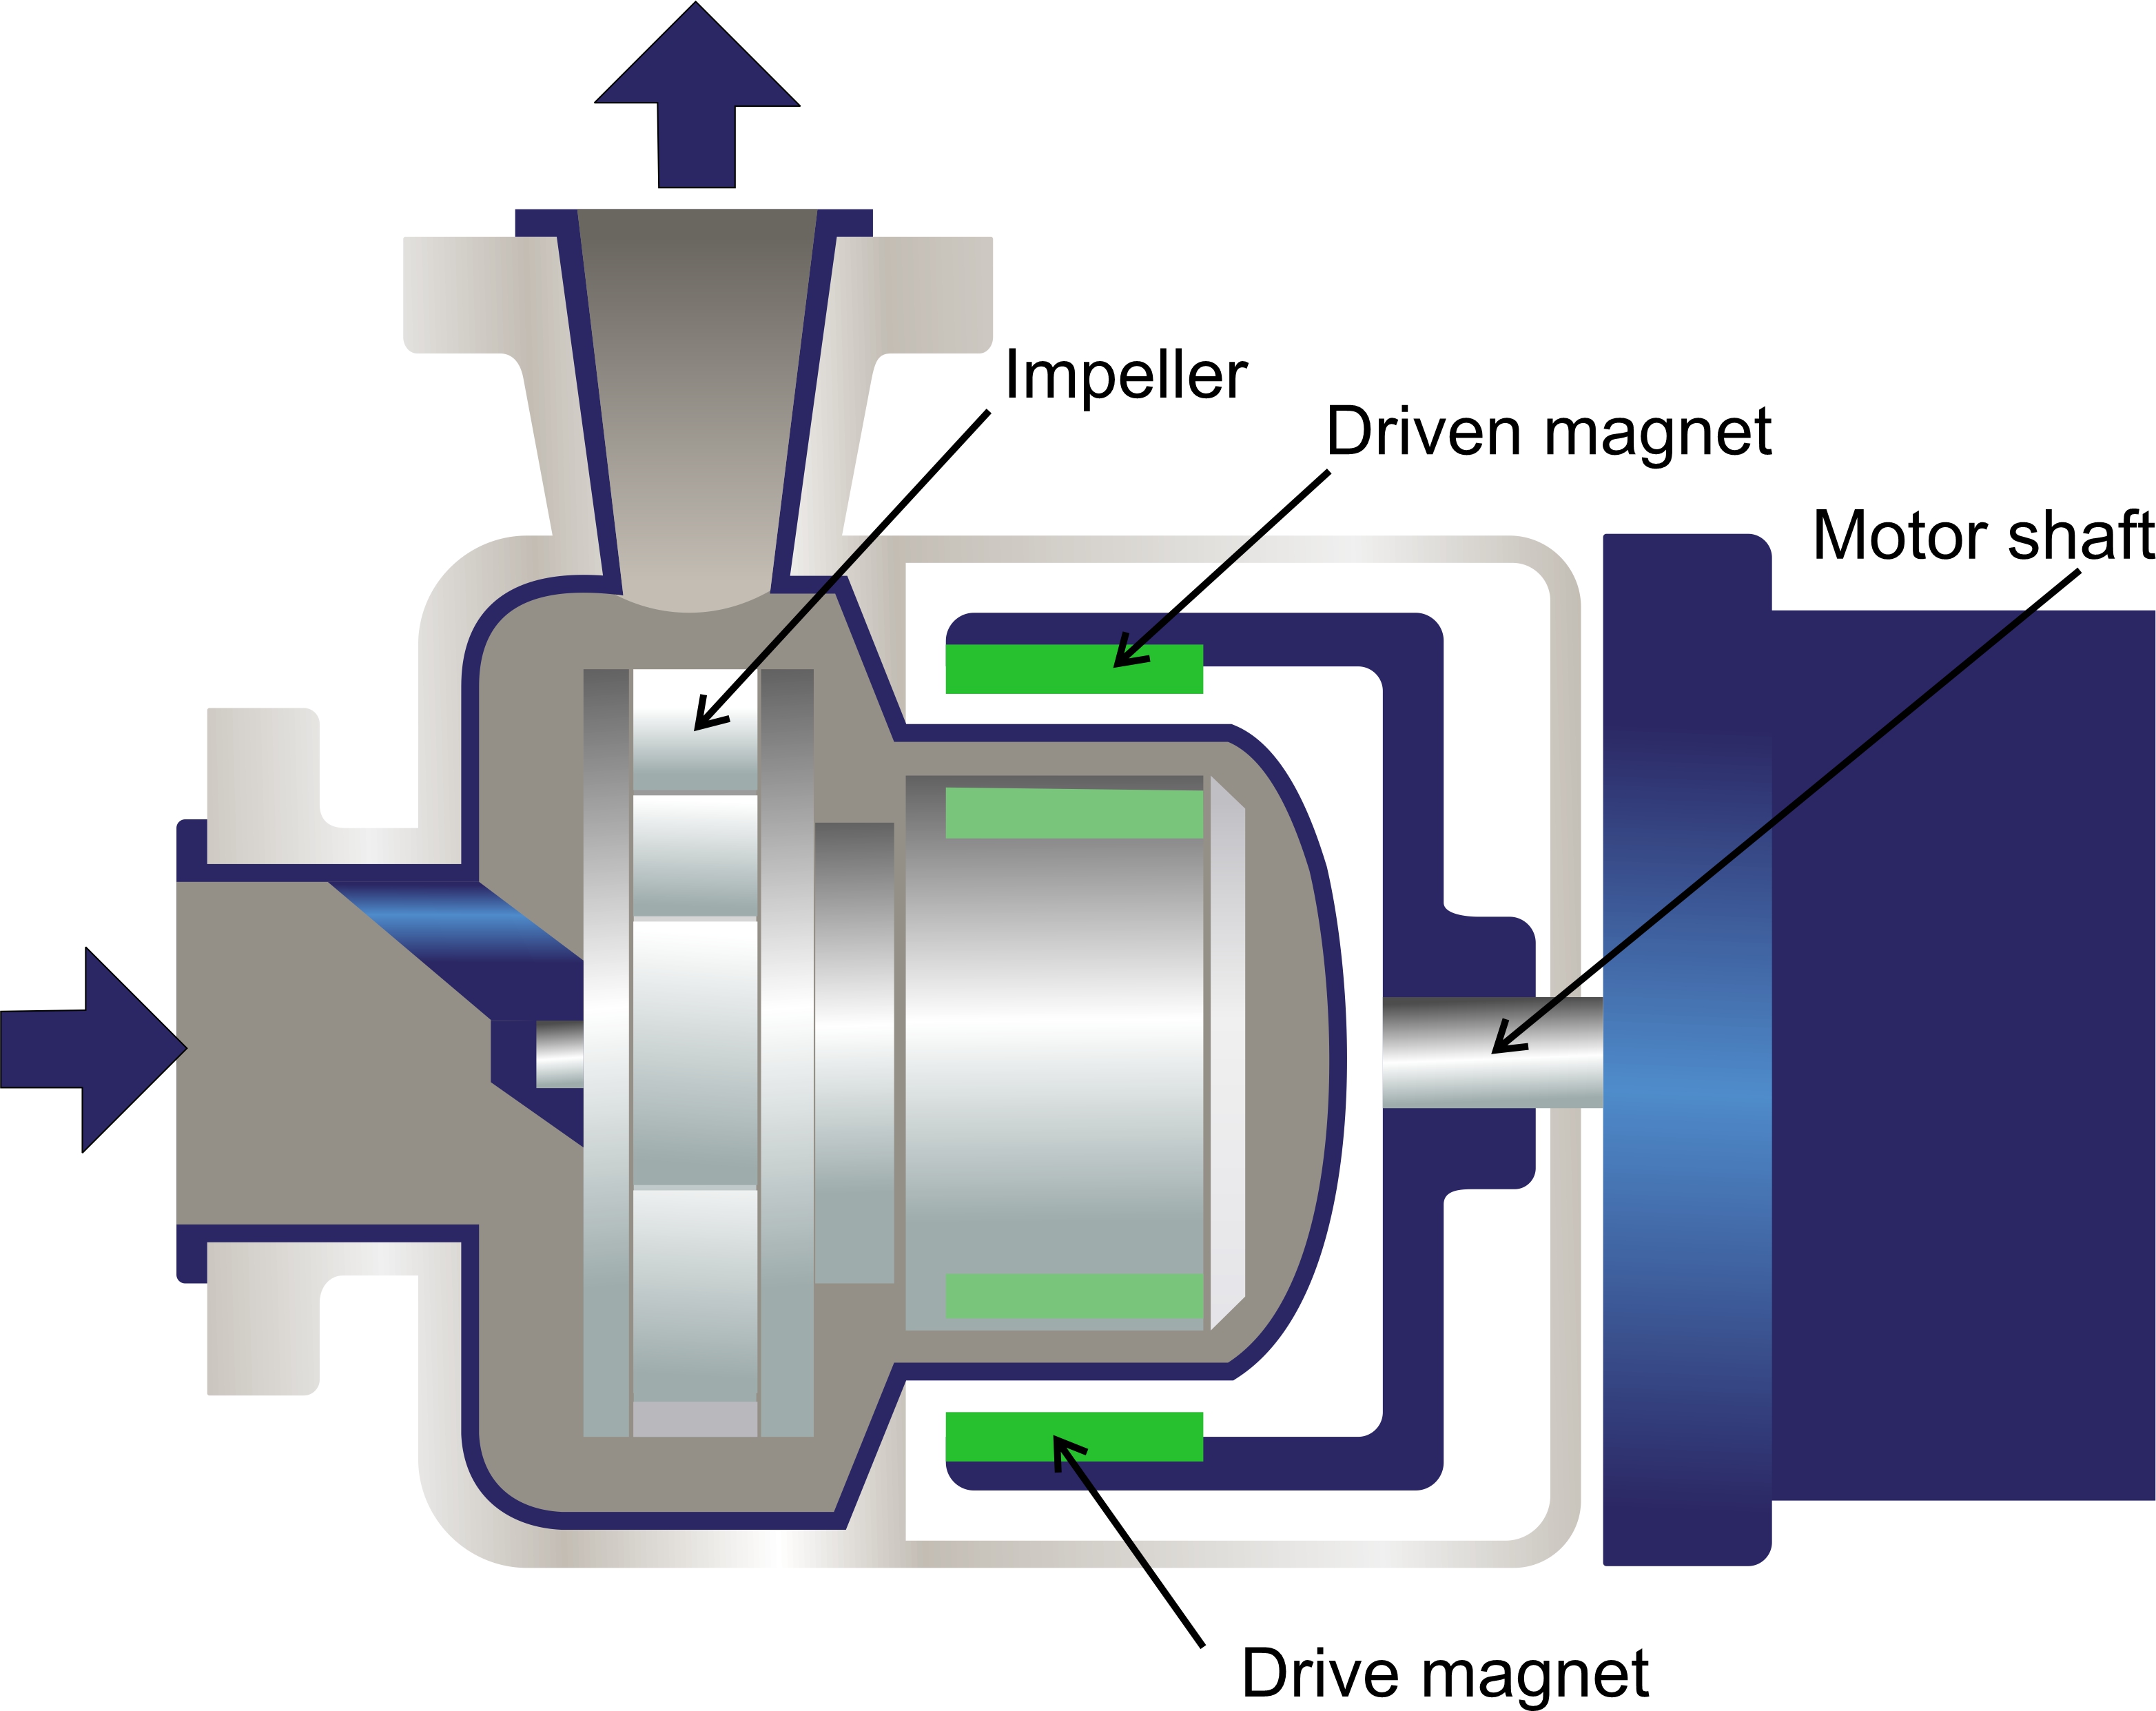
The first major thing I pulled out was the impeller assembly. This is the part that actually pushes the liquid. On this pump, the impeller was attached directly to an inner magnet assembly. It looked like a chunk of plastic or special metal with magnets embedded in it, sealed up tight.
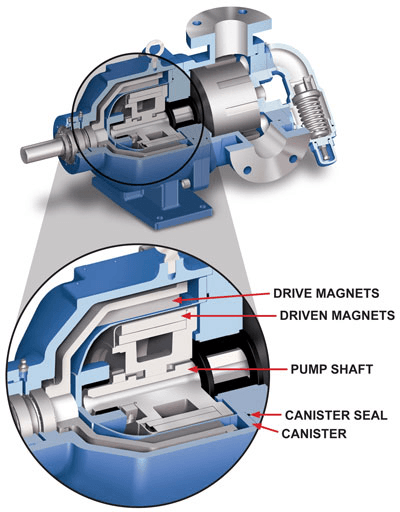
Now, the cool part. Behind where that impeller sat, still inside the wet end casing, was a sort of thin cup or shell. This is often called the containment shell. It’s super important because it seals the liquid part off completely from the motor part. No shaft seal needed like in regular pumps, which is the whole point.
Then I looked at the motor side. Attached to the motor shaft was another magnet assembly, the outer drive magnet. This one sits outside the containment shell.
- So you have the motor spinning the outer magnet.
- That magnetic force goes right through the containment shell.
- And it grabs onto the inner magnet (the one attached to the impeller).
- Makes the impeller spin without any physical connection, just magnets!
Checking and Cleaning
I took a good look at all these bits.
Checked the impeller for any damage to the blades or cracks. Made sure it spun freely on its little shaft or bearing point inside the casing.
Checked the inner magnet part for any signs of swelling or cracking in its protective coating. If that goes bad, the liquid can get to the magnet, which is usually bad news.
Inspected the containment shell very carefully. Looked for any scratches, cracks, or signs of wear. This part is critical for keeping things sealed. Even a small scratch could potentially become a problem later.
Wiped everything down. Got rid of any gunk or deposits that had built up, especially around the impeller and inside the casing.
Putting It Back Together
Reassembly was pretty much the reverse.
Slid the impeller/inner magnet assembly back into its spot inside the front casing. Made sure it sat right.
Carefully placed the front casing (with the impeller and containment shell sealing it) back onto the motor section. You gotta make sure the outer magnet on the motor shaft aligns nicely around the containment shell where the inner magnet is.
Lined everything up. Sometimes there are little alignment pins or marks.
Put the screws or bolts back in. Tightened them up evenly, usually in a star pattern, so the casing sealed up properly against its O-ring or gasket.
Final Check
Once it was all back together, I gave the motor shaft a little turn by hand (power still off!) just to feel if the magnets engaged and the impeller turned smoothly inside. Felt okay.
So yeah, that was my hands-on time with the magnetic drive pump parts. Pretty neat design, how they use magnets to avoid needing a traditional seal. Less chance of leaks, which is often why people use them in the first place. The key bits are really those two magnet assemblies and the shell in between them.